What is the geo-referencing process?
After having performed a proper mapping of the environment you can perform the geo-referencing process. The geo-referencing process is a one-time process that allows Dragonfly to create the link between the features saved within the 3D map and the position of those features within a chosen X, Y, Z metric/imperial coordinate system.
The process is performed by “showing” to Dragonfly what is the set of features seen when the camera is placed at some known reference points (called geo-referencing points or geo-ref points) through an accurate DWG file of the environment.
At the end of the geo-referencing process, Dragonfly will be ready to be used in production and it will provide:
- X, Y, Z metric/imperial coordinates;
- Orientation (pitch, yaw, roll).
Accuracy of the DWG file
To perform the geo-referencing process you MUST have a high-fidelity DWG of the environment(with at least 2 decimals of precision). It must be guaranteed that the dimensions and positions of the ground/road/pavements markings, walls and columns represented inside the DWG correspond 100% to those available in the warehouse. This is a must and an absolutely essential condition to perform the geo-referencing process.
Geo-referencing step by step
Step 1 – Prepare the moving asset for the geo-referencing
Because of the fact that the moving asset that will benefit from the Dragonfly indoor location might be cumbersome (e.g. a forklift), it might become difficult to ensure that the camera (mounted on the moving asset) is accurately positioned close to (or on top of) the geo-referencing points! This is why the geo-referencing process must be done with a mobile asset that is light, handy and small in size.
Our experience lead us to the choice of a wheeled trolley on which you can carry around a laptop running Dragonfly plus a camera attached firmly to a photography telescopic stand. So that:
- the photography telescopic stand will allow to set the camera at the same altitude at which you have created your maps (+-10 cm).
- the small size trolley will allow to accurately move the camera on top of (or close to) to the geo-referencing points!

Step 2 – Important concepts about geo-referencing points
There are some important concepts that must be kept in mind in order to place the geo-ref points:
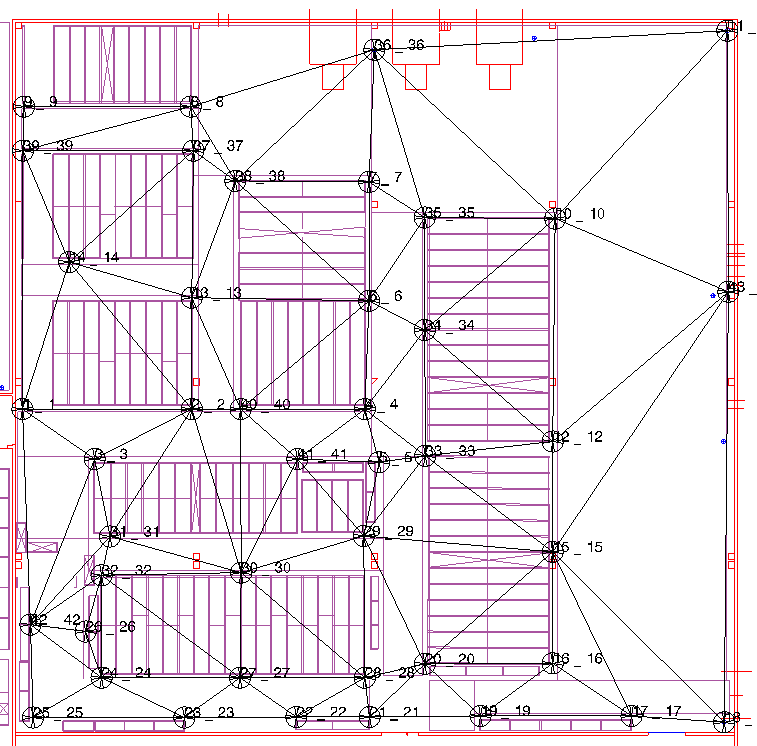
- The minimum number of geo-ref points is 3. After the placement of the 3rd geo-ref point, Dragonfly will start providing the X, Y, Z accurate coordinates and orientation of the camera.
- There is no limit for what concerns the number of geo-ref points that should be placed. So how many geo-ref points should be placed? The idea is to have:
- geo-ref points in the whole perimeter of the area that has been mapped.
- geo-ref points in those locations where the X,Y,Z provided by Dragonfly is not as accurate as expected.
- Regardless of the total number of geo-ref points set for your venue, in order to compute the position, Dragonfly uses the 3 geo-ref points closest to the estimated position of the camera.
- Dragonfly provides the highest accuracy within the virtual triangle created by connecting the 3 geo-ref points closest to the estimated position of the camera. So, if your position falls outside any of the virtual polygons created by connecting 3 geo-ref points closest to the estimated position, then that position might be less accurate.
- The geo-ref points should be placed in such a way that they are not in a row to each other thereby creating flattened virtual triangles.
Step 3 – Load the DXF of the plant
The very first step is load the DWG of the plant into Dragonfly:
- Click on the Maps menu button and load the map the you want to geo-reference.
- Click on the 3 bars button in the top menu and activate the Navigation only checkbox.
- Click on the 3 bars button in the top menu and deactivate the Enable Temporal Mapping checkbox.
- Click on the 3 bars button in the bottom left menu and click on Open DXF file. DXF is an open, text-based format for CAD data exchange. DWG is a proprietary, binary format for storing AutoCAD design data. You can easily find a tool convert your DWG into a DXF.
- Once the DXF is loaded you have to press on the Save button in the bottom bar in order to associate the DXF with the map. The DXF references will be added to the map JSON file.
Step 4 – Place the geo-referencing points
Follow these steps to add the geo-referencing points:
- Press on the green START button. The video feed should be displayed inside the video preview window. You can drag and drop the corner to modify the size of the video preview window.
- If nothing is shown inside the video preview then it means that the calibration file has not been selected OR the USB camera is not properly connected.
- The status will be switch from Idle, to Lost.
- Move your camera to start detecting the fiducial panels and the features associated to the objects in your environment.
- By now the status will switch from Lost to Navigation. During the process described in the next lines if the status switches from to Lost you have to move back to the area already mapped until the status switches back to Navigation and then you can keep following the process outlined.
- Move with the camera on top of (or close to) the first remarkable location where you would like to create the first geo-ref point. A remarkable location is a location inside your venue that can be identified without doubts in the reality and inside the DWG file of the venue (e.g. a ground storage position or a rack).
- click on the Markers tab in the bottom bar and click on the location icon (the location icon won’t be visible if you are Lost!)
- select Add marker by snap.
- move the cursor on point of the DWG that represents the current location (or approximate location) of your camera and click on it. A pop up will display the X, Y coordinates of that point. Add the altitude of the camera (Z).
- Now:
- If you are collecting a geo-ref point for a location drawn the ground (and the camera is on top of that location) – then you can just press on Save.
- If you are collecting a geo-ref point for a rack (and the camera is very close to the rack) – then you have to add/subtract the X, Y offset between the camera and the rack and press on Save.
- Move with the camera on top of (or close to) the second and third remarkable location where you will collect the second and third geo-ref point and follow the steps above.
- After the placement of the third geo-ref point the location will be displayed as X, Y, Z coordinates in the bottom-right area of the Dragonfly Web UI!
You can now place additional geo-ref points following the ratio explained at Step 2.
If you want to remove or modify the X, Y, Z coordinates any of the markers placed, you can do so by using the list button inside the Markers tab.
Please send us the information listed inside this page.
Information inside the Dragonfly UI
Central area
A 3D space where:
- the blue arrow represents your camera. You can use your mouse to zoom.
- there is the DWG file.
Top-left corner
- name of the current map.
Top-right corner
- the video preview on the right that shows what is seen by the camera where the dots represent the features associated to objects detected in your environment and the X,Y,Z axes represents the fiducial panels.
Bottom-right corner
- tracking FPS – provides an indication about the speed at which the system runs (it must be higher than 20 FPS to produce good results).
- map memory usage – weight of the map.
- Landmarks – number of features associated to objects/shapes detected in your environment and part of the current map.
- Keyframes – number of keyframes detected so far.
- Markers – number of ArUco markers detected so far.
- distance, driving time, average speed, stop time – usage information (provided after the placement of the third marker).
- X, Y, Z – these are the metric coordinates!
- roll, pitch, yaw – orientation in degrees of the device (more info inside this page).
Bottom-left corner
A toolbar is shown that can be used to manage the floor plan, view, devices, geofence and markers currently associated with the loaded map. Under the 3 lines menu in the most right side of the bottom bar you can click on:
- Show markers – to hide/show the geo-ref points.
- Show path – to hide/show the real-time path representing the movements of your camera.
- Show device name – to hide/show the name of your device.
- Show history path – to hide/show the historical path followed by your camera.
- Show triangle – to hide/show the lines connecting the markers.
- Show heatmap – to hide/show the heatmap of your device
- Show ArUco markers – to hide/show the fiducial panels.
Top bar
- Start/stop button – to start and stop the positioning engine to perform the mapping and then the geo-referencing process.
- Pause button – to pause the mapping process without stopping the engine.
- the 3D view button – to see the 3D map with the features detected (only visible when the engine is up and running!).
- the Position button – to see the 2D location of the device (over imposed on a floor plan image if available).
- the Search history button – see description inside this page.
- the Snapshot button – to save a snapshot of what is currently seen by the camera (only visible when the engine is up and running!).
- the down arrow – to visualize:
- the built-in parameters of the location engine.
- the camera parameters (that can be changed by clicking on the 3 lines button and then on the Camera Settings button).
- the 3 lines menu with these buttons:
- Navigation only – enable or disable the Navigation mode. While the system is in Navigation the map used for Navigation is not updated or changed during the navigation process. The navigation mode allows users to manage the virtual markers used for the geo-referencing of the map.
- Show video image – which allows to hide and show the video preview available on the top-right side of the GUI.
- Enable Aruco – to enable/disable the usage of ArUco markers. The ArUco markers are artificial fiducials used to make the maps more reliable when there is a low number or variability of the natural features. More info inside this page.
- Enable Temporary Mapping – allows Dragonfly to navigate within use unexplored areas (areas which features are not within the 3D map file) without getting LOST. Shown only in when the “Navigation” is checked!
- Store source feed video – which allows to save the original/raw video coming from the camera.
- Store processed video – which allows to save the processed video.
- Dashboard live location – to enable the possibility to see the live location inside the cloud dashboard. storage of the location data. An Internet connection is required to send position data to the Dragonfly Cloud Server.
- Save path in device – to enable the storage of the location data locally.
- Publish (camera info, settings, calibration files, maps, floorplans) – allows to push the local data to the Dragonfly Cloud Server in order to share settings, calibration files, maps, floor plans with other Dragonfly instances (e.g. a fleet of forklifts).
- Calibrate camera – to calibrate the camera as described in this page.
- Camera settings – to access all the settings related to your camera (shown ONLY when the location engine is STOPPED).